Welcome to our step-by-step guide on replacing the battery in your HP 15s-eq (15s-eq2055nm). Whether you’re experiencing diminished battery life or just looking to keep your device in top shape, this guide is for you. Please note that while we strive to provide detailed instructions, proceeding with this DIY repair may void your warranty. If unsure, consult with a professional.
Understanding Your Device
The HP 15s-eq series laptops are known for their efficiency and durability. However, like all electronic devices, their batteries have a limited lifespan. Replacing the battery can breathe new life into your laptop, ensuring it continues to serve your needs without being tethered to a power outlet.
Preparation: Tools and Safety
Before we dive into the disassembly process, let’s prepare:
- Tools Needed: Phillips #0 screwdriver, a plastic opening tool, and an anti-static wrist strap.
- Safety First: Ensure your laptop is powered off, unplugged from any power source, and placed on a clean, static-free surface. Wearing an anti-static wrist strap is recommended to prevent any damage to the laptop components.
Disassembly Steps
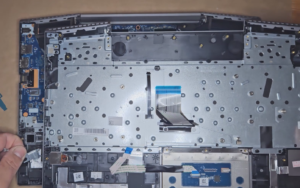
- Remove the Back Cover:
- Begin by flipping your HP 15s-eq2055nm upside down.
- Remove all visible screws from the bottom case using the Phillips #0 screwdriver. These screws hold the back cover in place. Remember the screw locations for reassembly.
- Gently use the plastic opening tool to pry open the back cover. Start from one corner and work your way around the laptop. Take your time to avoid damaging the clips that secure the cover.
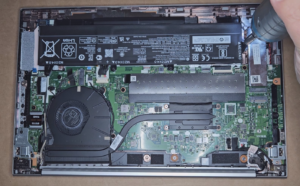
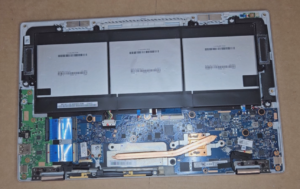
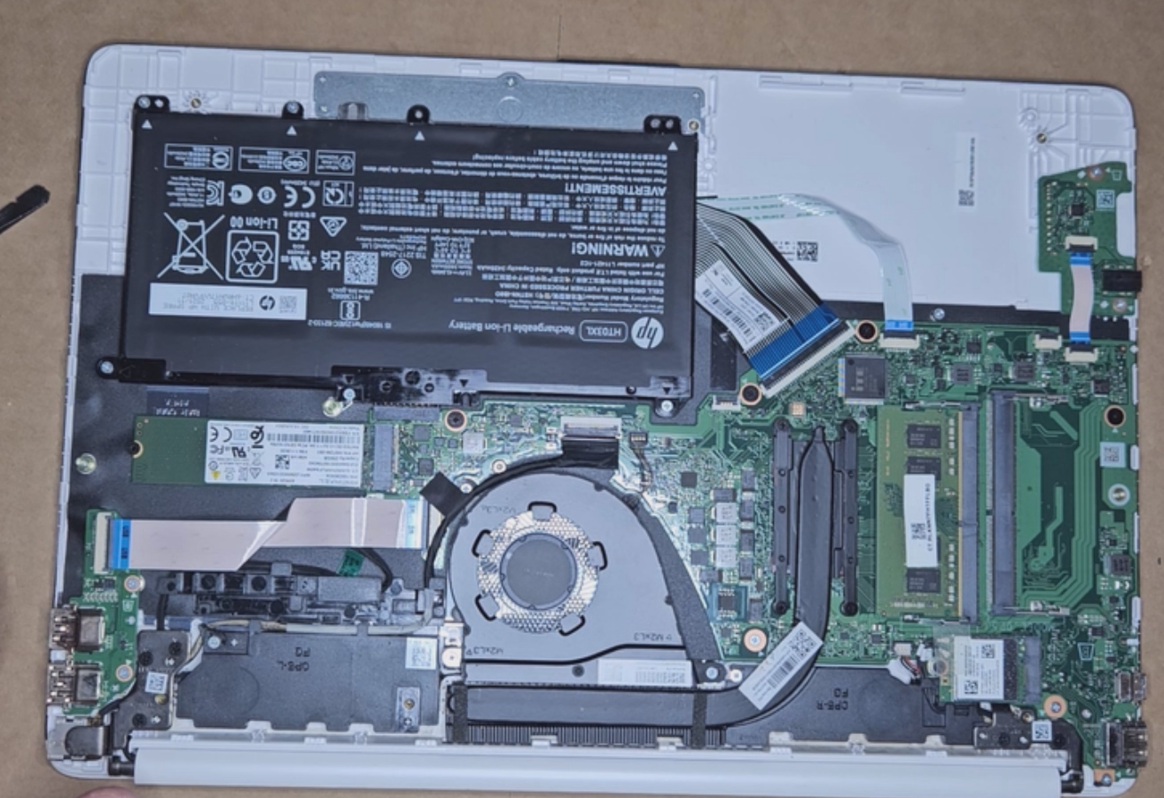
- Locate the Battery:
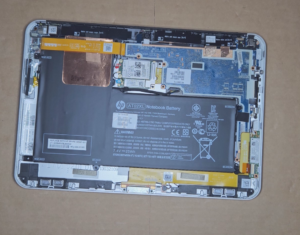
- Once the back cover is off, you’ll see the internal components of your laptop. The battery is usually a rectangular block, prominently placed and sometimes labeled.
- Before touching any components, ground yourself to avoid static discharge.
- Disconnect the Battery:
- Locate the battery connector on the motherboard. It’s crucial to disconnect the battery from the system before proceeding.
- Gently disconnect the battery connector by pulling it away from the motherboard. You might need to use your plastic opening tool for this step.
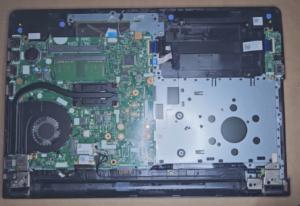
- Remove the Battery:
- Unscrew any screws securing the battery to the laptop’s chassis using your Phillips #0 screwdriver.
- Lift the battery away from the laptop. If there are any wires or adhesive, gently disconnect or detach them, being careful not to damage any surrounding components.
Replacing the Battery
- Insert the New Battery: Place your new battery into the slot where the old one was positioned. If there were any screws or adhesives involved in the previous step, secure the new battery in the same manner.
- Reconnect the Battery Connector: Carefully reconnect the battery connector to the motherboard. Ensure it’s securely attached.
- Reassemble the Laptop: Place the back cover onto the laptop. Press down gently around the edges and the center to snap the clips back into place. Replace all screws removed during the initial step.
- Power On: Once reassembled, turn on your laptop to ensure the new battery is functioning correctly. It’s recommended to charge it fully before using it to ensure battery calibration.
VIDEO guide:
Congratulations! You’ve successfully replaced the battery in your HP 15s-eq (15s-eq2055nm) laptop. This process not only extends the life of your device but also enhances your understanding of its internal workings. Remember, regular maintenance and timely replacements of components like batteries can significantly improve your laptop’s performance and longevity. If you encounter any issues during this process, seeking professional help is advisable to prevent damage to your device. Enjoy the freedom of extended battery life and the satisfaction of a job well done!