Are you looking to boost the performance of your Dell Inspiron 3567 P63F? Upgrading your hard drive to an SSD and replacing the old thermal paste can significantly enhance your laptop’s speed and cooling efficiency. This step-by-step guide will walk you through the process, ensuring a smooth upgrade experience.
VIDEO GUIDE:
Tools You’ll Need:
- Precision screwdriver set
- Anti-static wrist strap
- New SSD (make sure it’s compatible with your laptop)
- High-quality thermal paste
- Isopropyl alcohol and lint-free cloth for cleaning
Safety First:
Before you begin, ensure you’re working in a static-free environment to avoid damaging your laptop’s internal components. An anti-static wrist strap is highly recommended. Also, make sure your workspace is clean and well-lit.
Step 1: Preparing Your Laptop
- Power Off: Ensure your laptop is completely powered off, not just in sleep or hibernation mode.
- Disconnect Power and Peripherals: Unplug the power cord and remove any connected devices.
- Remove the Battery: If your model has a removable battery, take it out to prevent any power flow.
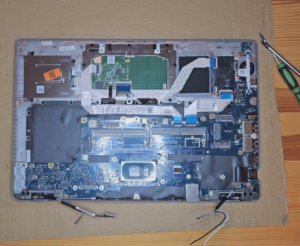
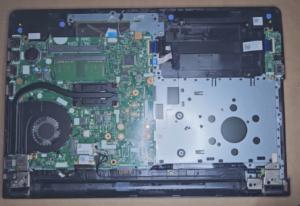
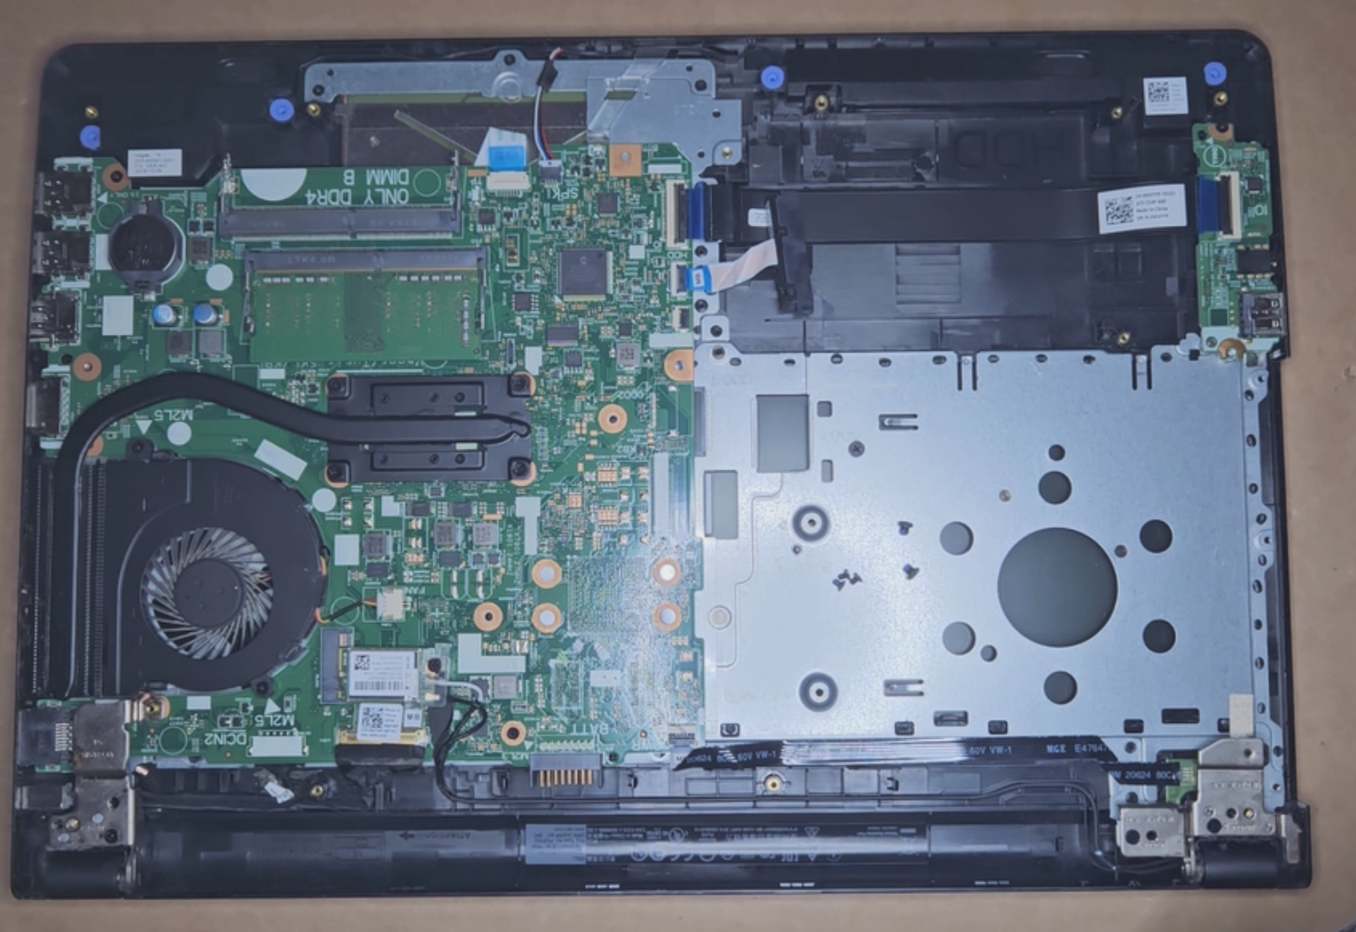
Step 2: Accessing the Internals
- Remove the Bottom Panel: Flip your laptop and locate the screws on the bottom panel. Use your precision screwdriver to remove these screws. Keep them in a safe place as they’re easy to lose.
- Open the Panel: Gently pry open the bottom panel. Take care not to force it open as you might damage the clips or cables inside.
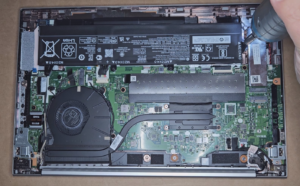
Step 3: Replacing the HDD with an SSD
- Locate the HDD: Inside, you’ll find the HDD in its mount, usually secured by screws and possibly connected by a SATA cable.
- Remove the HDD: Unscrew the mounting screws, disconnect the SATA cable if present, and carefully remove the HDD.
- Install the SSD: Place your new SSD in the same position as the old HDD. If needed, attach it to the mounting bracket from the HDD. Reconnect the SATA cable and screw the SSD into place.
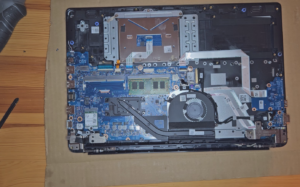
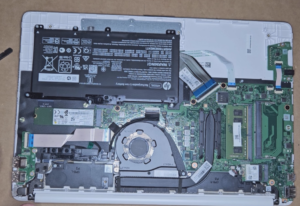
Step 4: Renewing the Thermal Paste
- Locate the CPU and Heat Sink: Find the CPU, which will be under a heat sink connected to a fan. This is usually near the center of the motherboard.
- Remove the Heat Sink: Unscrew the heat sink carefully. You may need to gently twist it to break the old thermal paste’s seal.
- Clean the CPU and Heat Sink: Use isopropyl alcohol and a lint-free cloth to remove the old thermal paste from both the CPU and the bottom of the heat sink.
- Apply New Thermal Paste: Apply a small pea-sized drop of new thermal paste to the center of the CPU. When you reattach the heat sink, it will spread the paste evenly.
Step 5: Reassembly and Testing
- Reattach the Heat Sink and Fan: Carefully place the heat sink back over the CPU, ensuring it’s correctly aligned. Screw it back into place.
- Close the Bottom Panel: Once everything is securely installed, place the bottom panel back on and screw it in place.
- Reinstall the Battery: If you removed the battery, now’s the time to put it back.
Final Steps:
Power on your laptop. You may need to enter the BIOS to recognize the new SSD. Once everything is up and running, you’ll notice a significant improvement in boot times, application launch speeds, and overall system responsiveness. The new thermal paste will help keep your system cooler, prolonging the life of your components.
By following these steps, you’ve not only upgraded your Dell Inspiron 3567 P63F but also taken a significant step towards maintaining its efficiency and longevity. Enjoy the new life you’ve given your laptop!