Upgrading or replacing components in your HP ZBook 15u G3 laptop can significantly improve its performance, extend its lifespan, or tailor it to your specific needs. Whether you’re looking to boost its speed with more RAM, increase storage with a new SSD, or just give it a general refresh, this article will guide you through the complete disassembly process. Please note that proceeding with this guide will likely void your warranty, and it’s essential to proceed with caution to avoid damaging your device.
HP laptop spare parts at Siggmo! Worldwide shipping!
VIDEO GUIDE:
Preparation
Before starting, ensure you have the necessary tools: a set of precision screwdrivers, an anti-static wristband, a plastic spudger, and a small container to keep screws organized. Back up your data, and make sure the laptop is turned off and unplugged from any power source. Work on a clean, static-free surface.
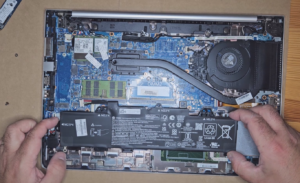
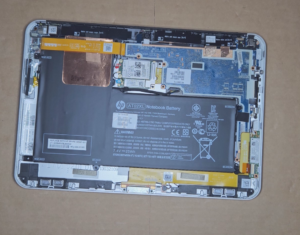
Step 1: Battery Removal
- Flip the laptop over to access its bottom.
- Remove all visible screws using your precision screwdriver.
- Carefully lift the bottom cover or slide it off if it’s designed that way.
- Disconnect the battery connector from the motherboard gently using the plastic spudger.
- Remove any screws securing the battery and take the battery out.
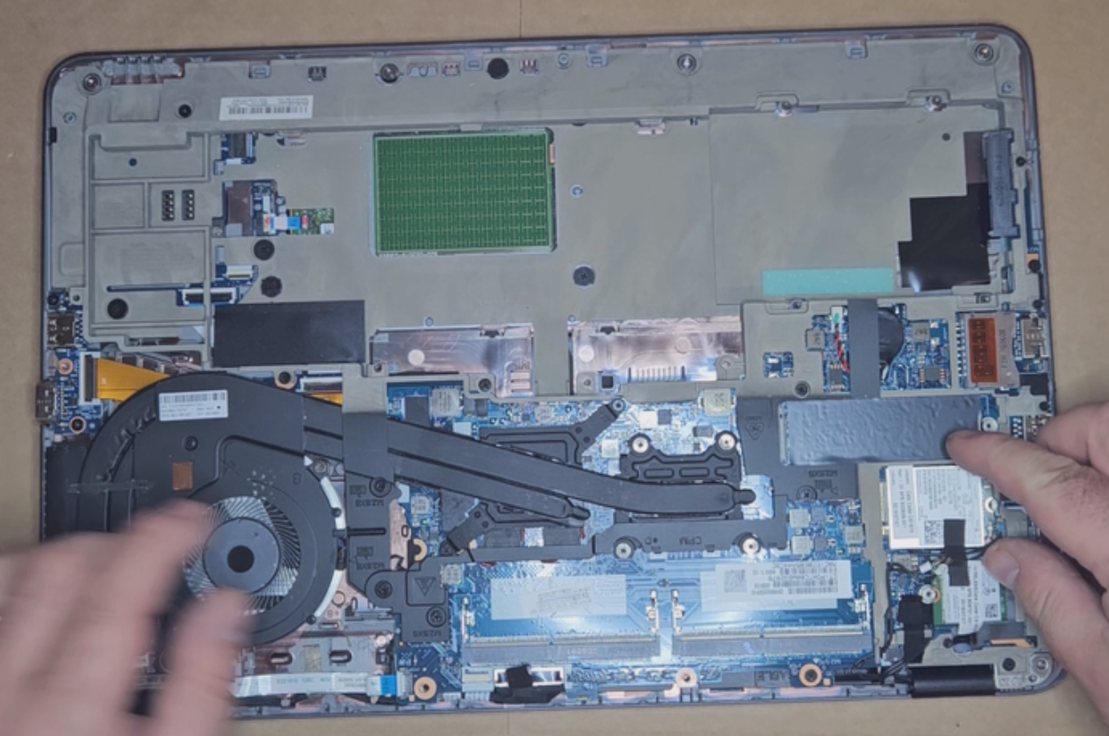
Step 2: RAM (Memory) Upgrade or Replacement
- Locate the RAM slots next to the battery compartment.
- Spread the clips holding the RAM module at the sides. The RAM will pop up.
- Gently pull the RAM out of its slot.
- To install new RAM, slide it into the slot at an angle and press down until the clips snap into place.
Step 3: SSD Disk Upgrade or Replacement
- Find the SSD near the RAM slots or under a protective cover.
- Remove the screw holding the SSD in place.
- Gently pull the SSD out of its slot.
- Slide the new SSD in and secure it with the previously removed screw.
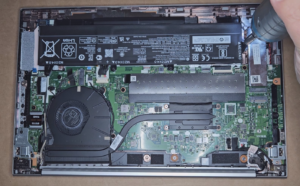
Step 4: Cooling System and Thermal Paste Application
- Locate the CPU and GPU cooling fans.
- Remove screws securing the fans and heatsink.
- Disconnect fan cables from the motherboard.
- Carefully lift the cooling assembly away.
- Clean the old thermal paste off the CPU and GPU with isopropyl alcohol and a lint-free cloth.
- Apply a small pea-sized amount of new thermal paste to the CPU and GPU.
- Reattach the cooling assembly and secure it with screws.
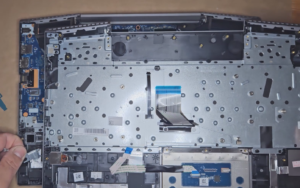
Step 5: Keyboard, Touchpad, and Palmrest Replacement
- Open the laptop and remove any screws securing the keyboard from the top, if applicable.
- Gently pry the keyboard up starting from the top.
- Disconnect the keyboard ribbon cable from the motherboard.
- For the touchpad and palmrest, after removing the keyboard, remove any additional screws revealed.
- Gently lift the palmrest to access and replace the touchpad if needed.
Step 6: Screen, Camera, and LCD Cable Replacement
- Remove the screw covers around the screen bezel.
- Unscrew the bezel and gently pry it off.
- Remove any screws securing the LCD panel.
- Tilt the screen forward to access the camera and LCD cable.
- Disconnect the LCD cable and camera connector.
- Replace the screen, camera, or LCD cable as needed and reassemble in reverse order.
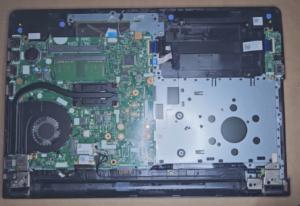
Step 7: Speakers, WiFi Card, and Power Jack
- Locate the speakers on either side of the battery compartment. Remove screws and disconnect cables to replace them.
- The WiFi card is usually near the RAM slots, secured by a screw and connected by antennae wires. Disconnect, remove, and replace as needed.
- For the power jack, you may need to disassemble further, including removing the motherboard. This process varies significantly by model, so consult a service manual for detailed steps.
Reassembly and Testing
Reverse the disassembly steps to reassemble your laptop. Be cautious with cable connections and ensure everything is secured before powering on. Test all functions to ensure everything works as expected after the upgrade or replacement.
Upgrading or replacing components in your ZBook 15u G3 can breathe new life into your laptop, making it more suited to your needs. However, it’s crucial to approach this process with care, patience, and proper tools to ensure success and avoid damage.