Venturing into the world of laptop parts can be both fascinating and rewarding. Whether you’re a tech enthusiast or someone looking for ways to enhance performance, knowing your way around the laptop’s interior can be invaluable. In this guide, we’ll walk through the process of opening the HP Victus 16-e0544nz (part of the 16 e0 series) with a focus on upgrading the memory. Additionally, we’ll pinpoint the locations of other key components like the SSD disks, battery, fan, and motherboard.
Preparation: Safety Comes First
- Backup: Ensure all essential data on your laptop is backed up.
- Anti-static Precautions: Wear an anti-static wrist strap to avoid any potential damage to the laptop parts due to static electricity.
- Workspace: Use a well-lit, spacious, and clutter-free area.
Disassembling the HP Victus 16-e0544nz
1. Power Down & Prep:
- Turn off the laptop completely.
- Disconnect the power adapter and any external peripherals.
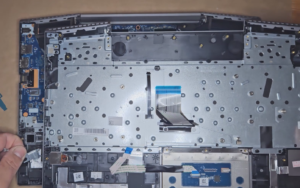
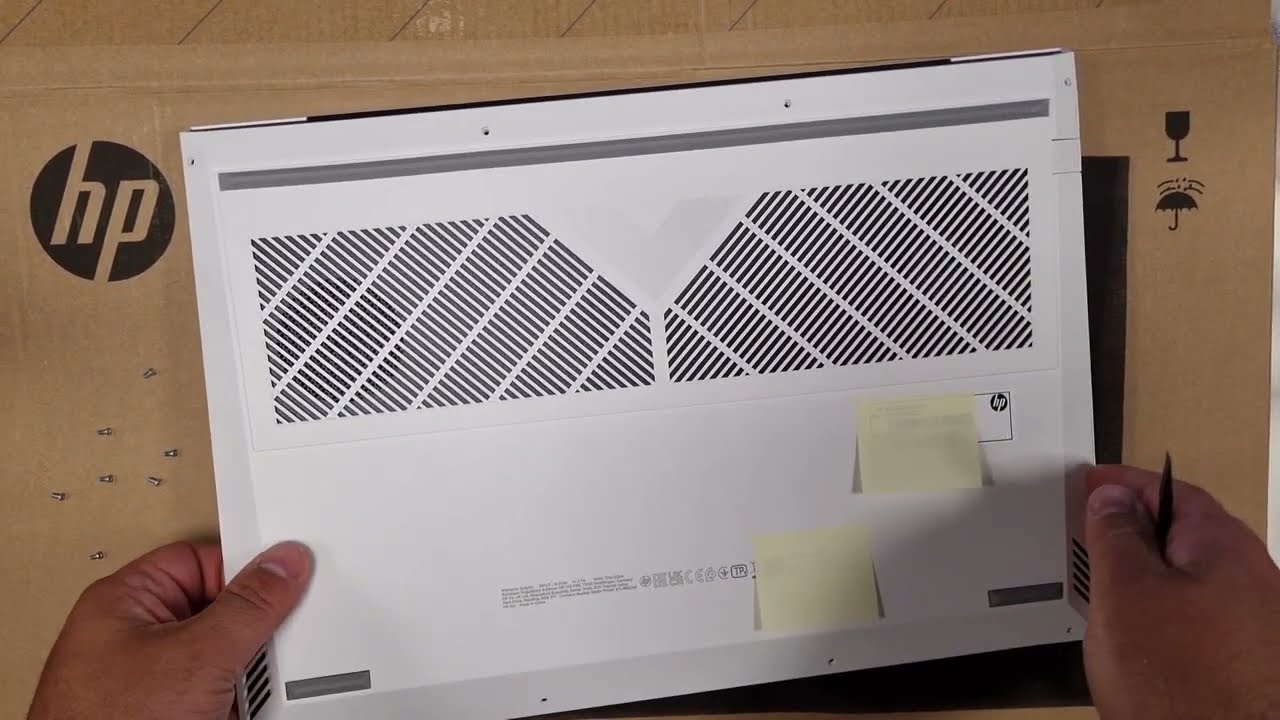
2. Remove the Base:
- Place the laptop upside down.
- Unscrew all the visible screws on the base. Keep them organized as they might differ in size.
- Using a plastic spudger or card, gently pry up the base from one corner and work your way around.
Upgrading the Memory (RAM)
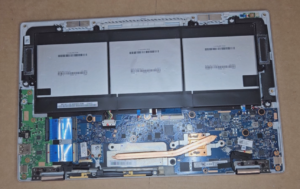
1. Locate the Memory Slot:
- Once inside, you’ll spot the RAM shielded within a metal cover.
- Release the clips on the sides, and the RAM module will pop up at an angle.
2. RAM Installation:
- Ensure your new RAM is compatible with the HP Victus 16-e0544nz.
- Align the notch on the new RAM module with the one on the slot.
- Insert it at an angle, then press down until it clicks into place.
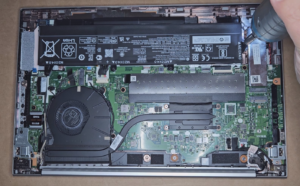
Locating Other Key Components
1. SSD Disks:
- Near the RAM, you’ll spot the M.2 slots for the SSDs, usually fastened with a single screw. If upgrading, unscrew, slide out the old SSD, and replace.
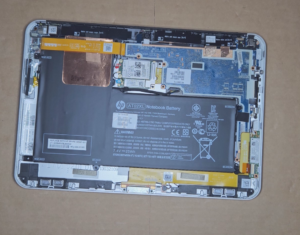
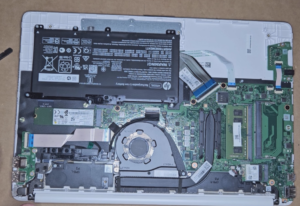
2. Battery:
- The battery spans a significant area and is easily recognizable. If replacing, ensure the laptop is unplugged, and gently disconnect the battery connector from the motherboard.
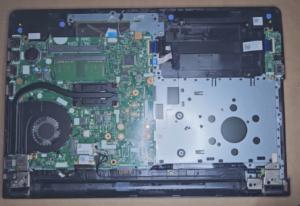
3. Fan & Cooling System:
- Located close to the CPU and GPU, the fans dissipate heat. If cleaning or replacing, unscrew the fan unit and disconnect its power cable.
4. Motherboard:
- The motherboard is the primary, large circuit board connecting all components. Handle with care and only when necessary.
Reassembly:
- After upgrades or checks, replace the base cover.
- Firmly press it down to click into place.
- Screw in all previously removed screws.
VIDEO:
Diving into the intricate world of laptop parts, especially for models like the HP Victus 16-e0544nz, can seem intimidating. However, with a clear guide and a bit of patience, it becomes an achievable task. By understanding the layout and function of each component, not only can you execute upgrades, but you also deepen your appreciation for the marvels of modern tech. Always consult the official HP documentation or professionals for specific concerns. Here’s to efficient and informed tinkering!