The excitement of buying a new gaming laptop often comes with the expectation of blazing-fast speeds and high-end performance. But as your storage needs grow, you might find yourself yearning for a more spacious and faster SSD. Fortunately, upgrading the NVME SSD disk in your HP Gaming 15-ec2003ne laptop is a relatively straightforward task.
In this guide, we’ll walk you through the step-by-step process of disassembling your HP Gaming 15-ec2003ne laptop to upgrade its NVME SSD disk. For those looking for laptop parts or interested in the nitty-gritty of laptop internals, this guide serves as an excellent resource.
What You’ll Need
Before you start, gather the following tools and equipment:
- New NVME SSD Disk compatible with HP Gaming 15-ec2003ne
- Phillips screwdriver (small)
- Plastic spudger or opening tools
- Anti-static wristband or mat (optional, but recommended)
Safety Precautions
- Backup Important Data: Ensure that all your essential data is backed up before you start.
- Turn Off and Unplug: Power down the laptop and disconnect it from any external power source.
- Ground Yourself: Use an anti-static wristband to prevent any accidental static discharge that could damage sensitive components.
The Step-By-Step Guide
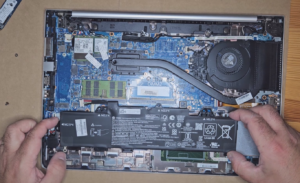
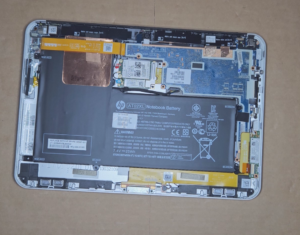
Step 1: Remove the Battery (if detachable)
If your model has a detachable battery, remove it to minimize the risk of any electrical issues.
Step 2: Open the Back Cover
- Turn your HP Gaming 15-ec2003ne laptop upside down.
- Locate the screws securing the back cover in place.
- Use a Phillips screwdriver to remove these screws.
- Carefully use a plastic spudger to pry open the back cover. Make sure to start from one corner and work your way around to avoid damaging any clips that may be holding the cover.
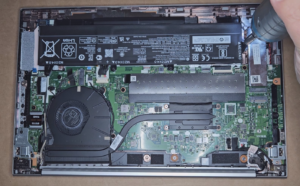
Step 3: Locate the SSD
Once the back cover is removed, you should be able to locate the NVME SSD disk easily. It’s often housed in a small rectangular slot on the motherboard.
Step 4: Remove the Old SSD
- Unscrew the single screw that usually holds the SSD in its slot.
- Carefully slide out the old SSD from its slot.
Step 5: Insert the New SSD
- Align the new NVME SSD with the slot at a slight angle.
- Gently insert the SSD into the slot.
- Lower it down and secure it with the screw you removed earlier.
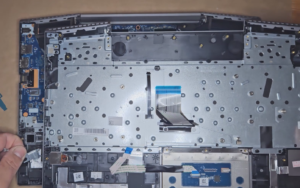
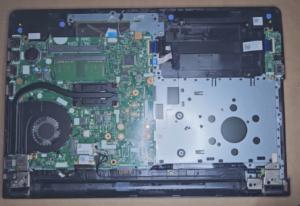
Step 6: Reassemble the Laptop
- Place the back cover back onto the laptop, aligning it correctly with the chassis.
- Secure it with the screws you removed at the beginning.
Step 7: Power Up and Initialize Your New SSD
- Turn on your laptop.
- You may need to initialize the new SSD using the disk management features in your operating system.
VIDEO:
Upgrading your NVME SSD disk not only gives you more space but can also drastically improve your laptop’s performance. Learning the ins and outs of laptop parts and how to upgrade them can save you a considerable amount of money and extend the life of your device.
Whether you’re a casual gamer or a hardcore tech enthusiast, understanding how to upgrade components like the SSD can provide you with an enriching experience, well beyond the realms of mere gaming.
Remember, if you have any difficulties during the upgrade, it’s always wise to consult with professionals. Happy upgrading!