If you own an HP Omen 17 W2 Series (specifically the 17-w216nf model), you’re likely impressed by its gaming capabilities and overall performance. However, as technology advances, you might find yourself in need of more storage space or speed. Fortunately, upgrading or replacing the NVME SSD M.2 disk is a straightforward process, and it’s a significant aspect when you consider laptop parts upgrades for better performance.
Why Upgrade the NVME SSD M.2 Disk?
Upgrading your SSD can have several advantages:
- Faster Load Times: Games, software, and even your operating system will load faster.
- Increased Storage: More space for games, files, or programs.
- Improved Data Transfer: An upgraded SSD will allow quicker data transfer speeds, which is especially useful for large files.
Before diving into the upgrade, make sure you’re working on a clean and flat surface, and you have your tools and new NVME SSD ready.
Important: The following steps may void your warranty or cause damage if not done carefully. Proceed at your own risk and ensure to backup all your important data before you start.
Tools Needed:
- Small Phillips-head screwdriver
- Plastic Spudger or guitar pick
- Anti-static wrist strap (optional but recommended)
Step-By-Step Guide
Step 1: Power Off and Unplug
Ensure that the laptop is completely powered off and unplugged from any power source. Remove the battery if possible.
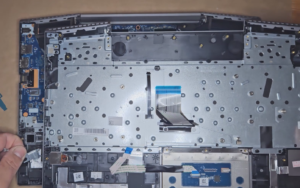
Step 2: Open the Back Panel
Flip your HP Omen 17 W2 laptop upside down. You’ll see several screws around the edge and perhaps one or two in the middle. Use your Phillips-head screwdriver to remove these screws and keep them in a safe place.
Once screws are removed, carefully pry open the back panel using a plastic spudger or guitar pick. Work your way around the edges gently to avoid breaking any plastic tabs.
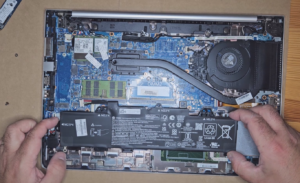
Step 3: Locate the NVME SSD M.2 Slot
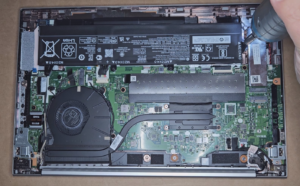
Once you’re inside, you’ll see various laptop parts including the battery, cooling fan, and, of course, the current NVME SSD. The SSD should be secured with one or two screws.
Step 4: Remove the Old SSD
Unscrew the SSD and gently pull it out of the M.2 slot.
Step 5: Install the New SSD
Slide the new SSD into the M.2 slot at about a 30-degree angle. Once it’s fully inserted, screw it in place.
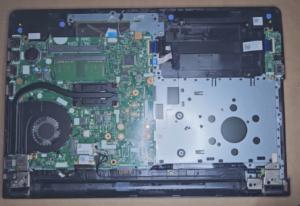
Step 6: Reassemble Your Laptop
After ensuring that the SSD is secure, place the back panel on your laptop, ensuring that all clips snap back into place. Screw in all the screws you previously removed.
Step 7: Power On and Initialize
Turn your laptop back on. You may need to enter the BIOS to initialize the new SSD or format it once the operating system loads.
Video:
Upgrading or replacing the NVME SSD M.2 disk in your HP Omen 17 W2 Series laptop is one of the most efficient ways to improve its performance. Laptop parts like SSDs offer a great opportunity for upgrades, even for those with limited technical know-how. Always make sure to follow each step carefully and happy upgrading!
By following these steps, you’ll not only gain a better understanding of laptop parts but also optimize your HP Omen 17 for better performance.