Completing a disassembly of a Fujitsu Lifebook E546 laptop requires precision, patience, and a bit of technical know-how. Whether you’re looking to upgrade, replace, or simply clean its components, this step-by-step guide will walk you through the process, ensuring your laptop functions optimally and continues to serve you well.
Tools You’ll Need:
- Precision screwdriver set
- Anti-static wrist strap
- Plastic spudger
- Tweezers
- Small container or tray for screws
Preparation: Before you start, ensure you are working in a clean, well-lit, and static-free environment. Wear an anti-static wrist strap to prevent damaging the laptop’s internal components with static electricity.
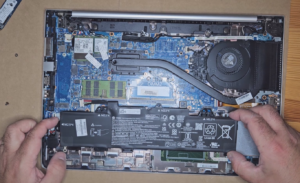
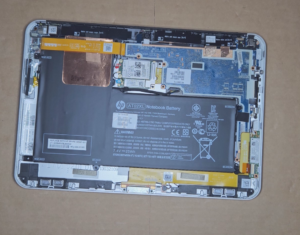
Step 1: Power Off and Remove Battery Ensure the laptop is completely powered off and unplugged. Flip the laptop over, release the battery latch, and carefully remove the battery.
Step 2: Accessing the Back Panel Remove the screws from the back panel of the laptop using your precision screwdriver. Keep the screws in a small container to avoid losing them. Gently pry open the panel with a plastic spudger to reveal the internal components.
Step 3: Upgrading RAM/Memory Locate the RAM slots. If you’re upgrading, gently release the clips on the side of the RAM stick, and it will pop up. Carefully pull it out and replace it with the new RAM, ensuring it’s securely in place.
Step 4: Replacing or Upgrading the SSD Disk Identify the SSD disk. Unscrew it and gently slide it out. Replace or upgrade it by sliding in the new disk and securing it with screws.
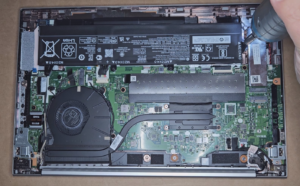
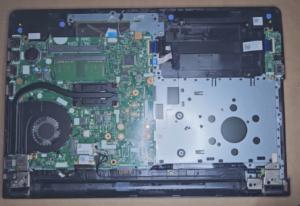
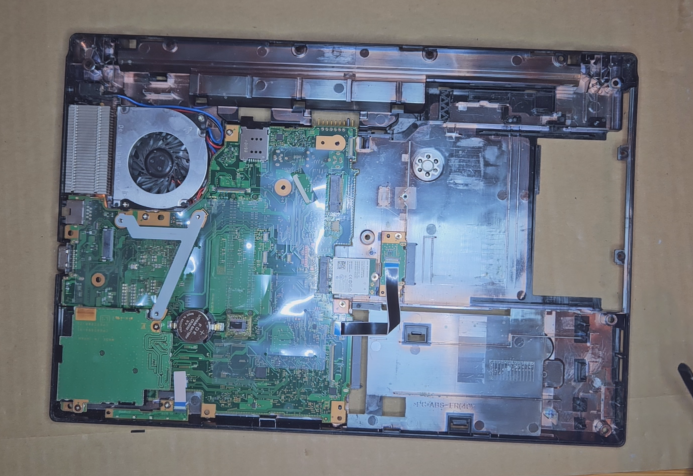
Step 5: Motherboard and Thermal Paste To access the motherboard, you’ll need to remove more screws. Carefully disconnect any cables attached to it. If you’re replacing the thermal paste, clean the old paste off the CPU and apply a new, pea-sized amount before reseating the cooler.
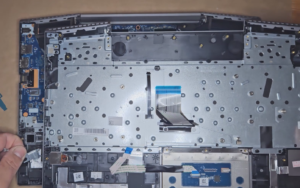
Step 6: Replacing the Keyboard, Palmrest, and Touchpad These are usually attached with screws and clips. Gently pry them up with a spudger, unscrew, and disconnect the cables. Replace with new components and reattach.
Step 7: Screen, Camera, and LCD Cable If you’re replacing the screen or camera, gently remove the bezel around the screen, unscrew the screen, and disconnect the camera and LCD cable. Replace as needed and reassemble.
Step 8: Speakers, Case/Housing, and WiFi Card Locate and remove the speakers, WiFi card, and any other components you wish to replace. They are typically screwed in and connected with small cables. Be gentle and patient.
Step 9: Power Jack Accessing the power jack might require further disassembly. Follow similar steps as before, ensuring you’re careful with the delicate wiring.
Step 10: Reassembly Carefully reassemble all components in reverse order. Ensure all screws are tightened and cables are correctly connected.
Final Steps: Once reassembled, insert the battery, plug in the laptop, and power it on. Check if all newly installed components are recognized and functioning.
Video guide:
Important Notes:
- Keep track of all screws and their respective places.
- Handle all components with care, especially the delicate connectors.
- If unsure about any step, refer to the Fujitsu Lifebook E546’s manual or consult a professional.
Disassembling and upgrading your laptop can significantly extend its lifespan and improve its performance. With careful handling and a bit of technical knowledge, your Fujitsu Lifebook E546 will be running smoothly with its new upgrades.